Documentation
Getting Started
Etsy
Printify
Account Management
Prelist Policies
Printify
Neck Labels
Written By: Alek
Last Updated on August 8, 2025
Adding Neck Labels to All Your Products in the Printify Product Uploader
Whether you want to include your logo, brand name, or sizing info, this feature ensures your neck label stays consistent across every product you upload.
Why Add a Neck Label?
Branding: Showcase your store name and style.
Professional Look: Replace generic manufacturer tags with your own design.
Consistency: Keep your branding uniform across all sizes, colors, and styles.
How to Use the Neck Label Feature
1. Start Your Product Upload
Begin as you normally would in the Prelist Printify Product Uploader by selecting your product(s) and uploading your main design.
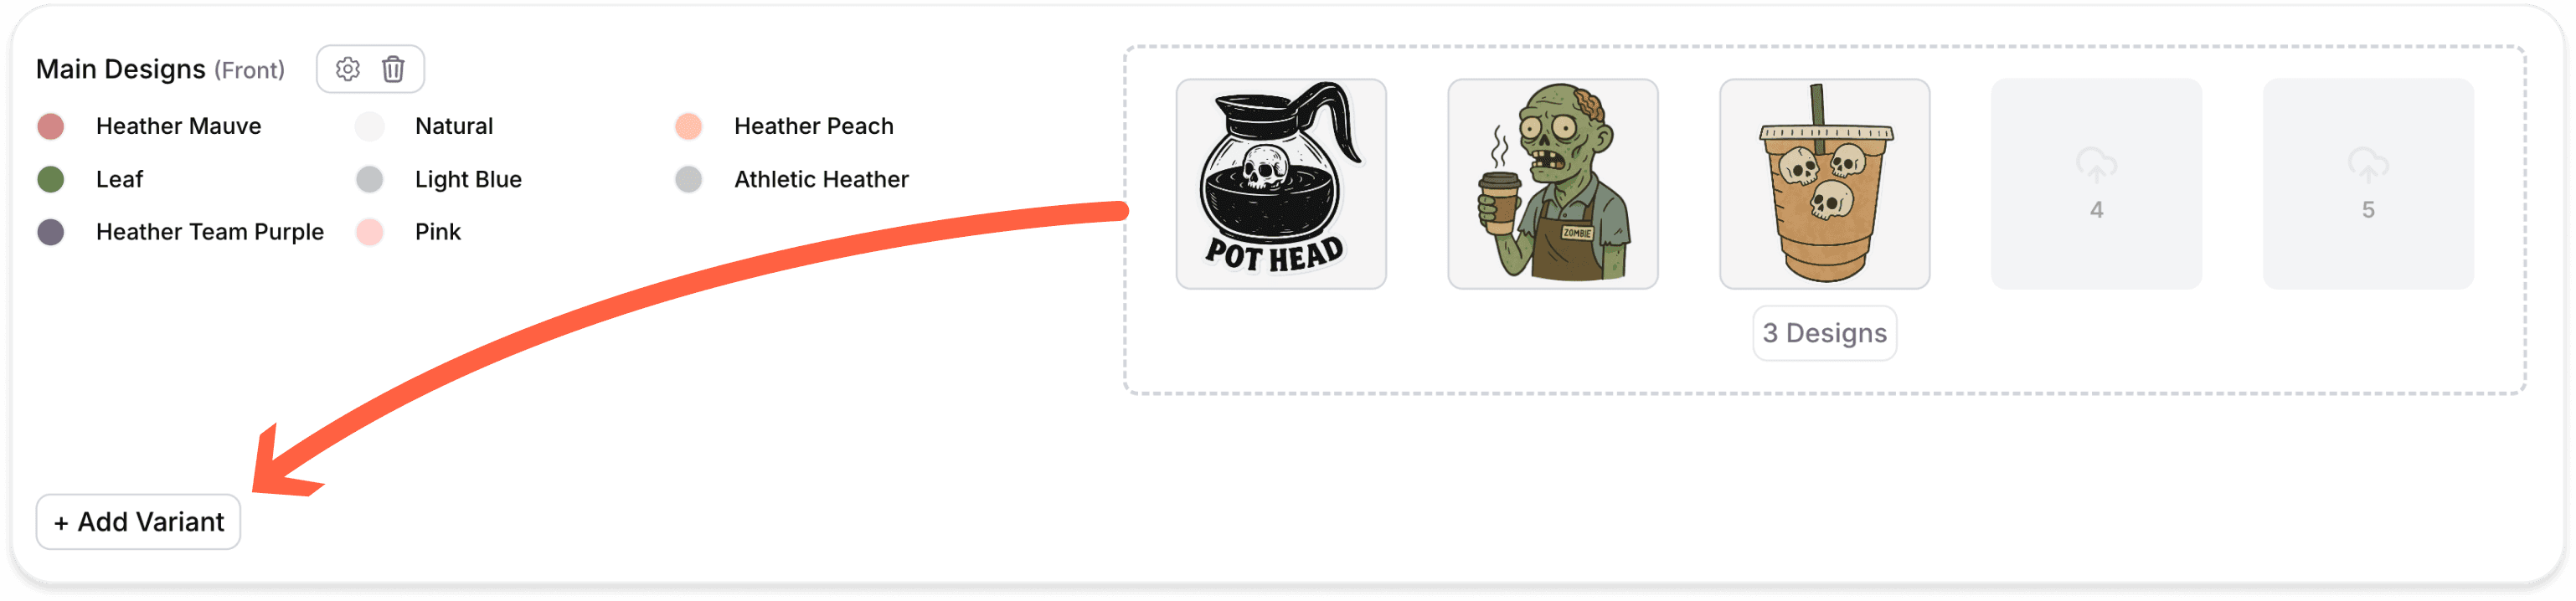
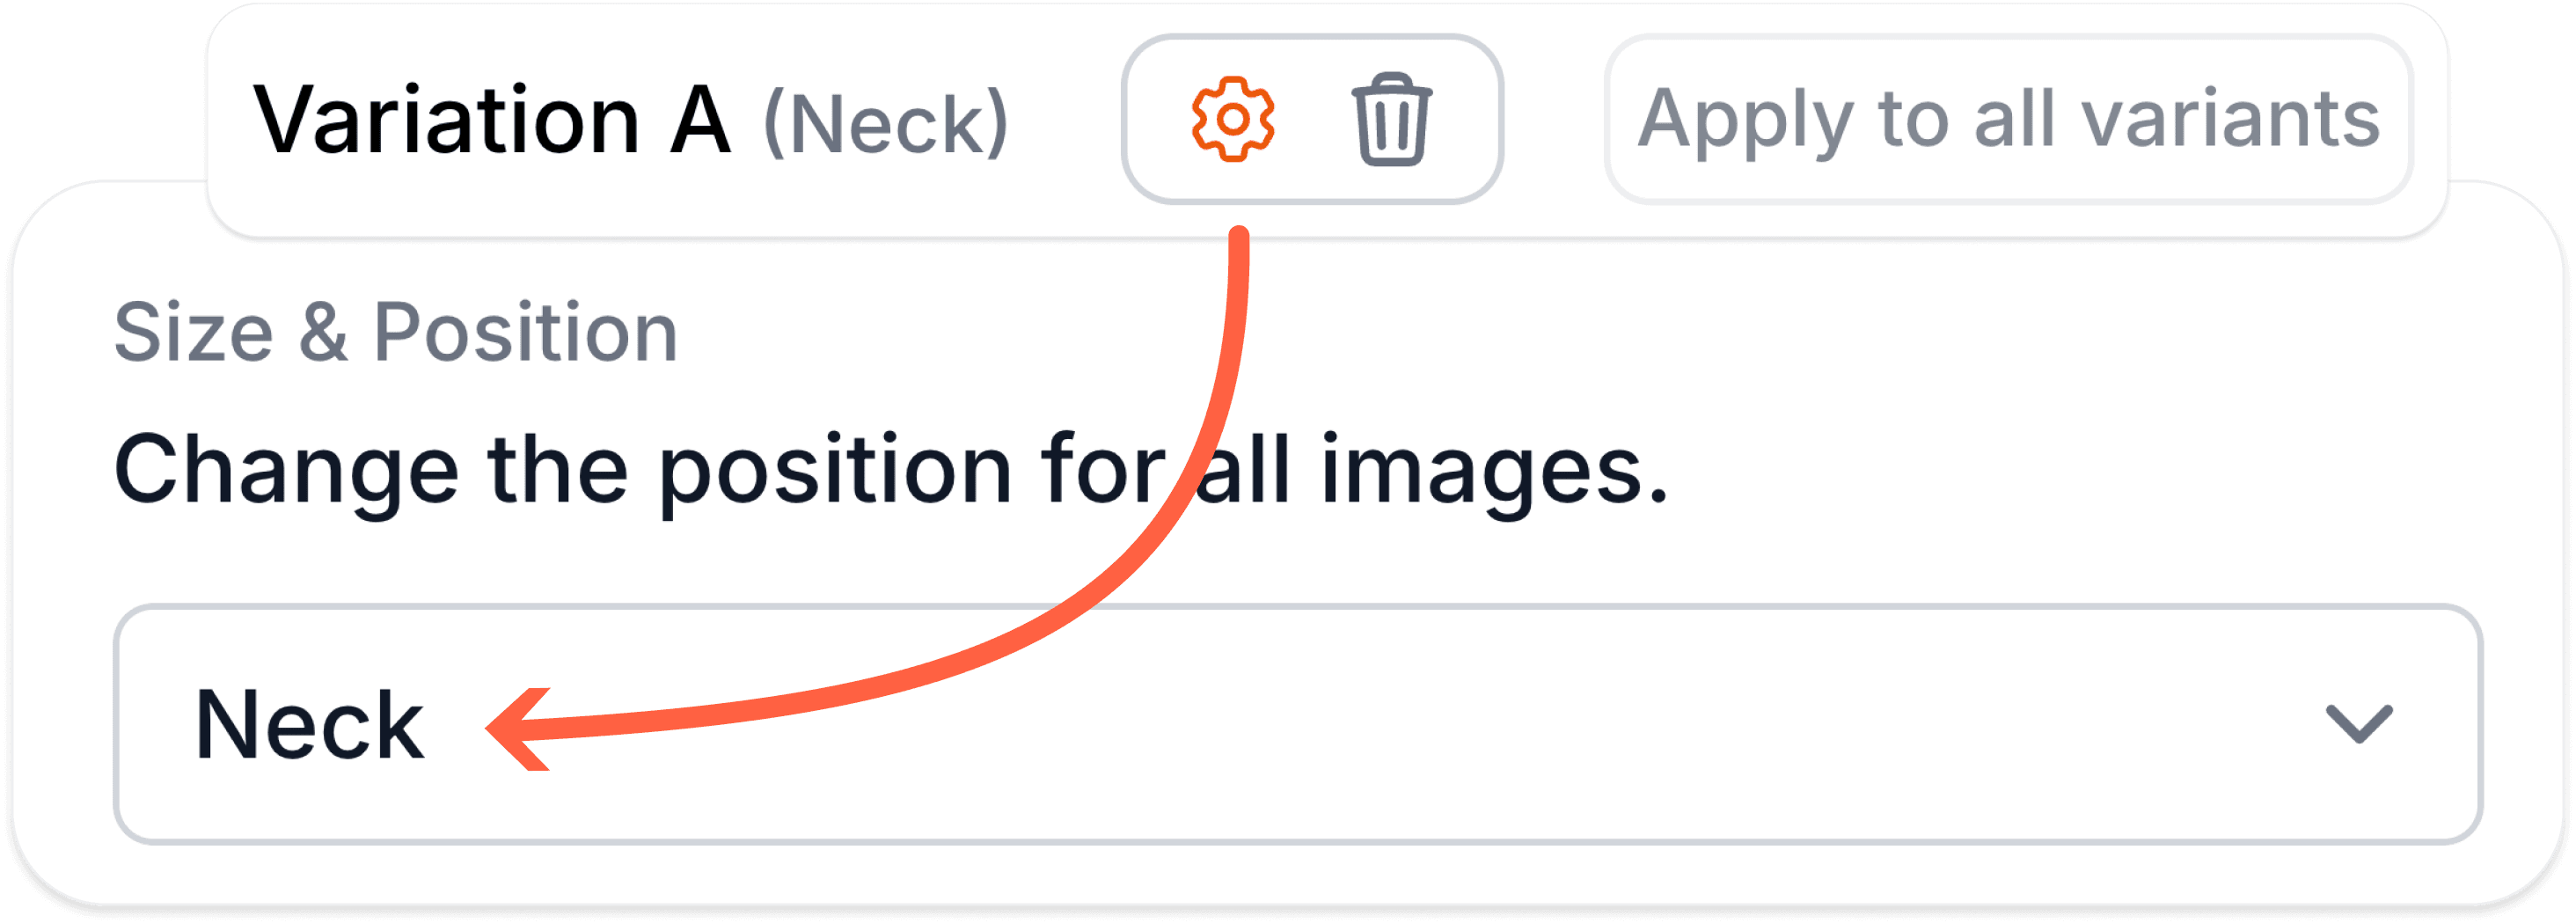
2. Add a Variant for the Neck Label
Click Add Variant in the uploader.
Change the Print Area to Neck.
Upload your neck label design file.
This will place your design in the neck label area for that variant.
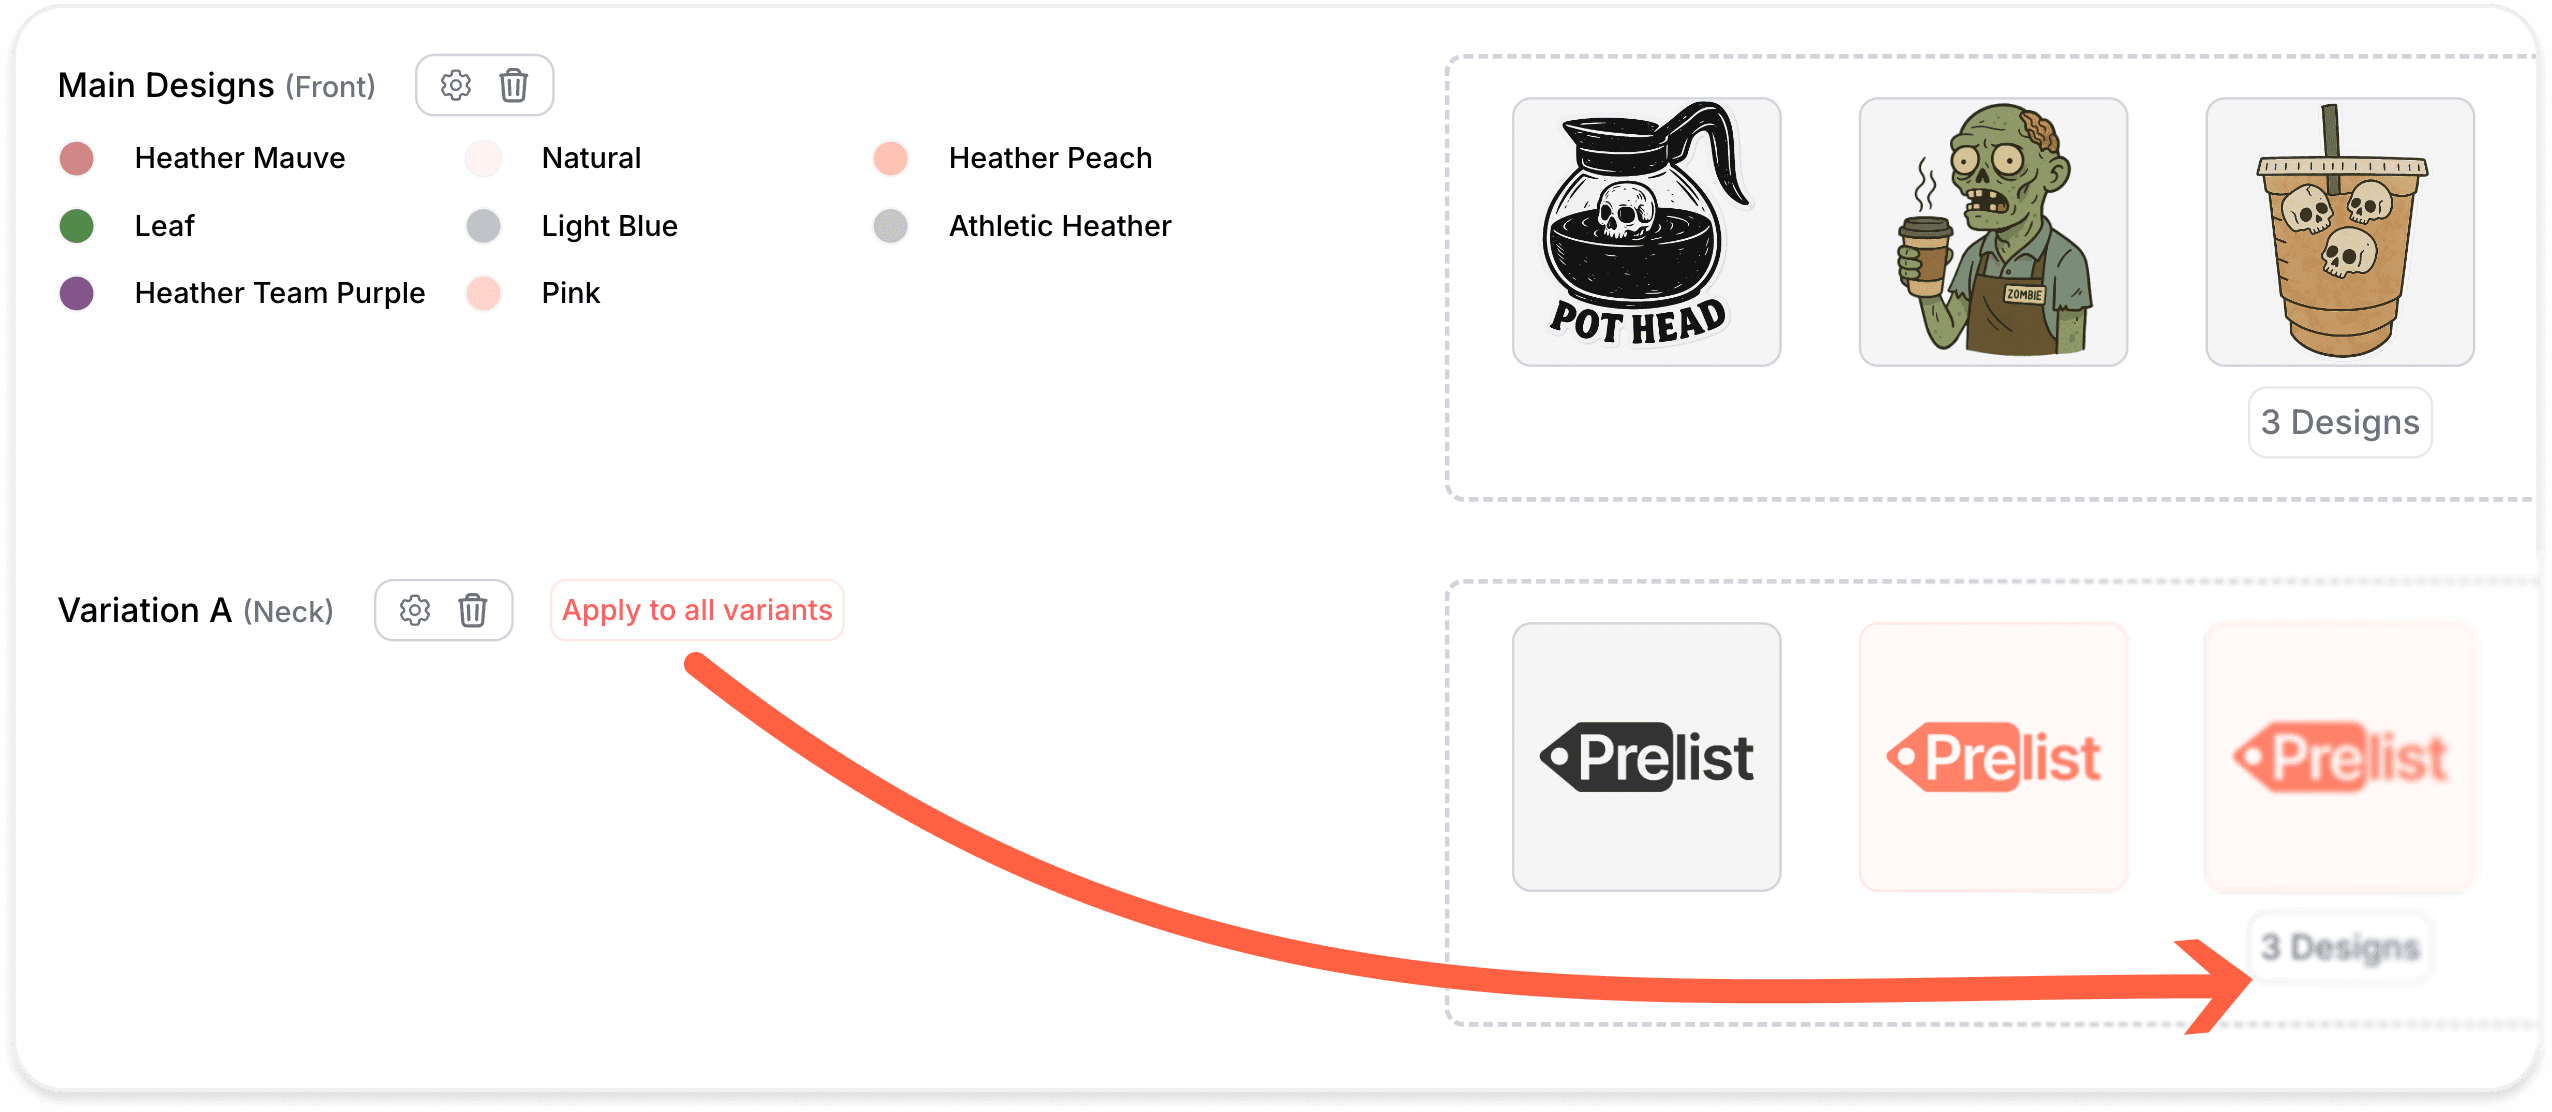
3. Apply to All Variants
If you want the same neck label on every variant in your upload, then after your design file is uploaded:
Click the Apply to All Variants button.
Your neck label design will instantly be applied to every product and size in the batch.
4. Finish and Publish
Once your designs are set:
Review your mockups to ensure everything looks right.
Continue the upload process as normal to send your products to Printify.
Tips for Best Results
Keep it Simple: Include only essential info like logo, size, and care instructions.
Test Once, Apply Everywhere: The “Apply to All Variants” button ensures you only have to set it up once.
With this feature, branding your products is faster and easier than ever. Add your neck label once, apply it to every variant, and keep your store looking consistent and professional.
Need Help Getting Started?
Getting Started Guide